Halloween Cookies

Overview

Ingredients - Dough

Ingredients - Decoration

Notes

Prep time 10+15 min / Fridge time 60 min / Baking time 15 min (spooky fingers) // 5-8 min (Halloween 

Cookies) per batch, Oven temperature 200° (180° Umluft/Air Circulation)

Halloween Cookies, baking

Preparing the Dough

Halloween Cookies

The great thing about this recipe is that you only have to prepare one dough in order to make two completely different types of Halloween cookies – and seriously, who isn’t happy to get double the reward for working once?

  • Mix the ingredients for the dough, until is has a homogeneous texture. Divide the dough into 2 equal pieces and colour it with food colouring if you like
  • Put the dough into the fridge for ~60 minutes
  • In the meantime, if you want to use marzipan, bring it into the shape of fingernails or claws
  • Preheat the oven to 200° (180° Umluft/Air Circulation) once the dough is ready to be processed

Part 1: Spooky Fingers

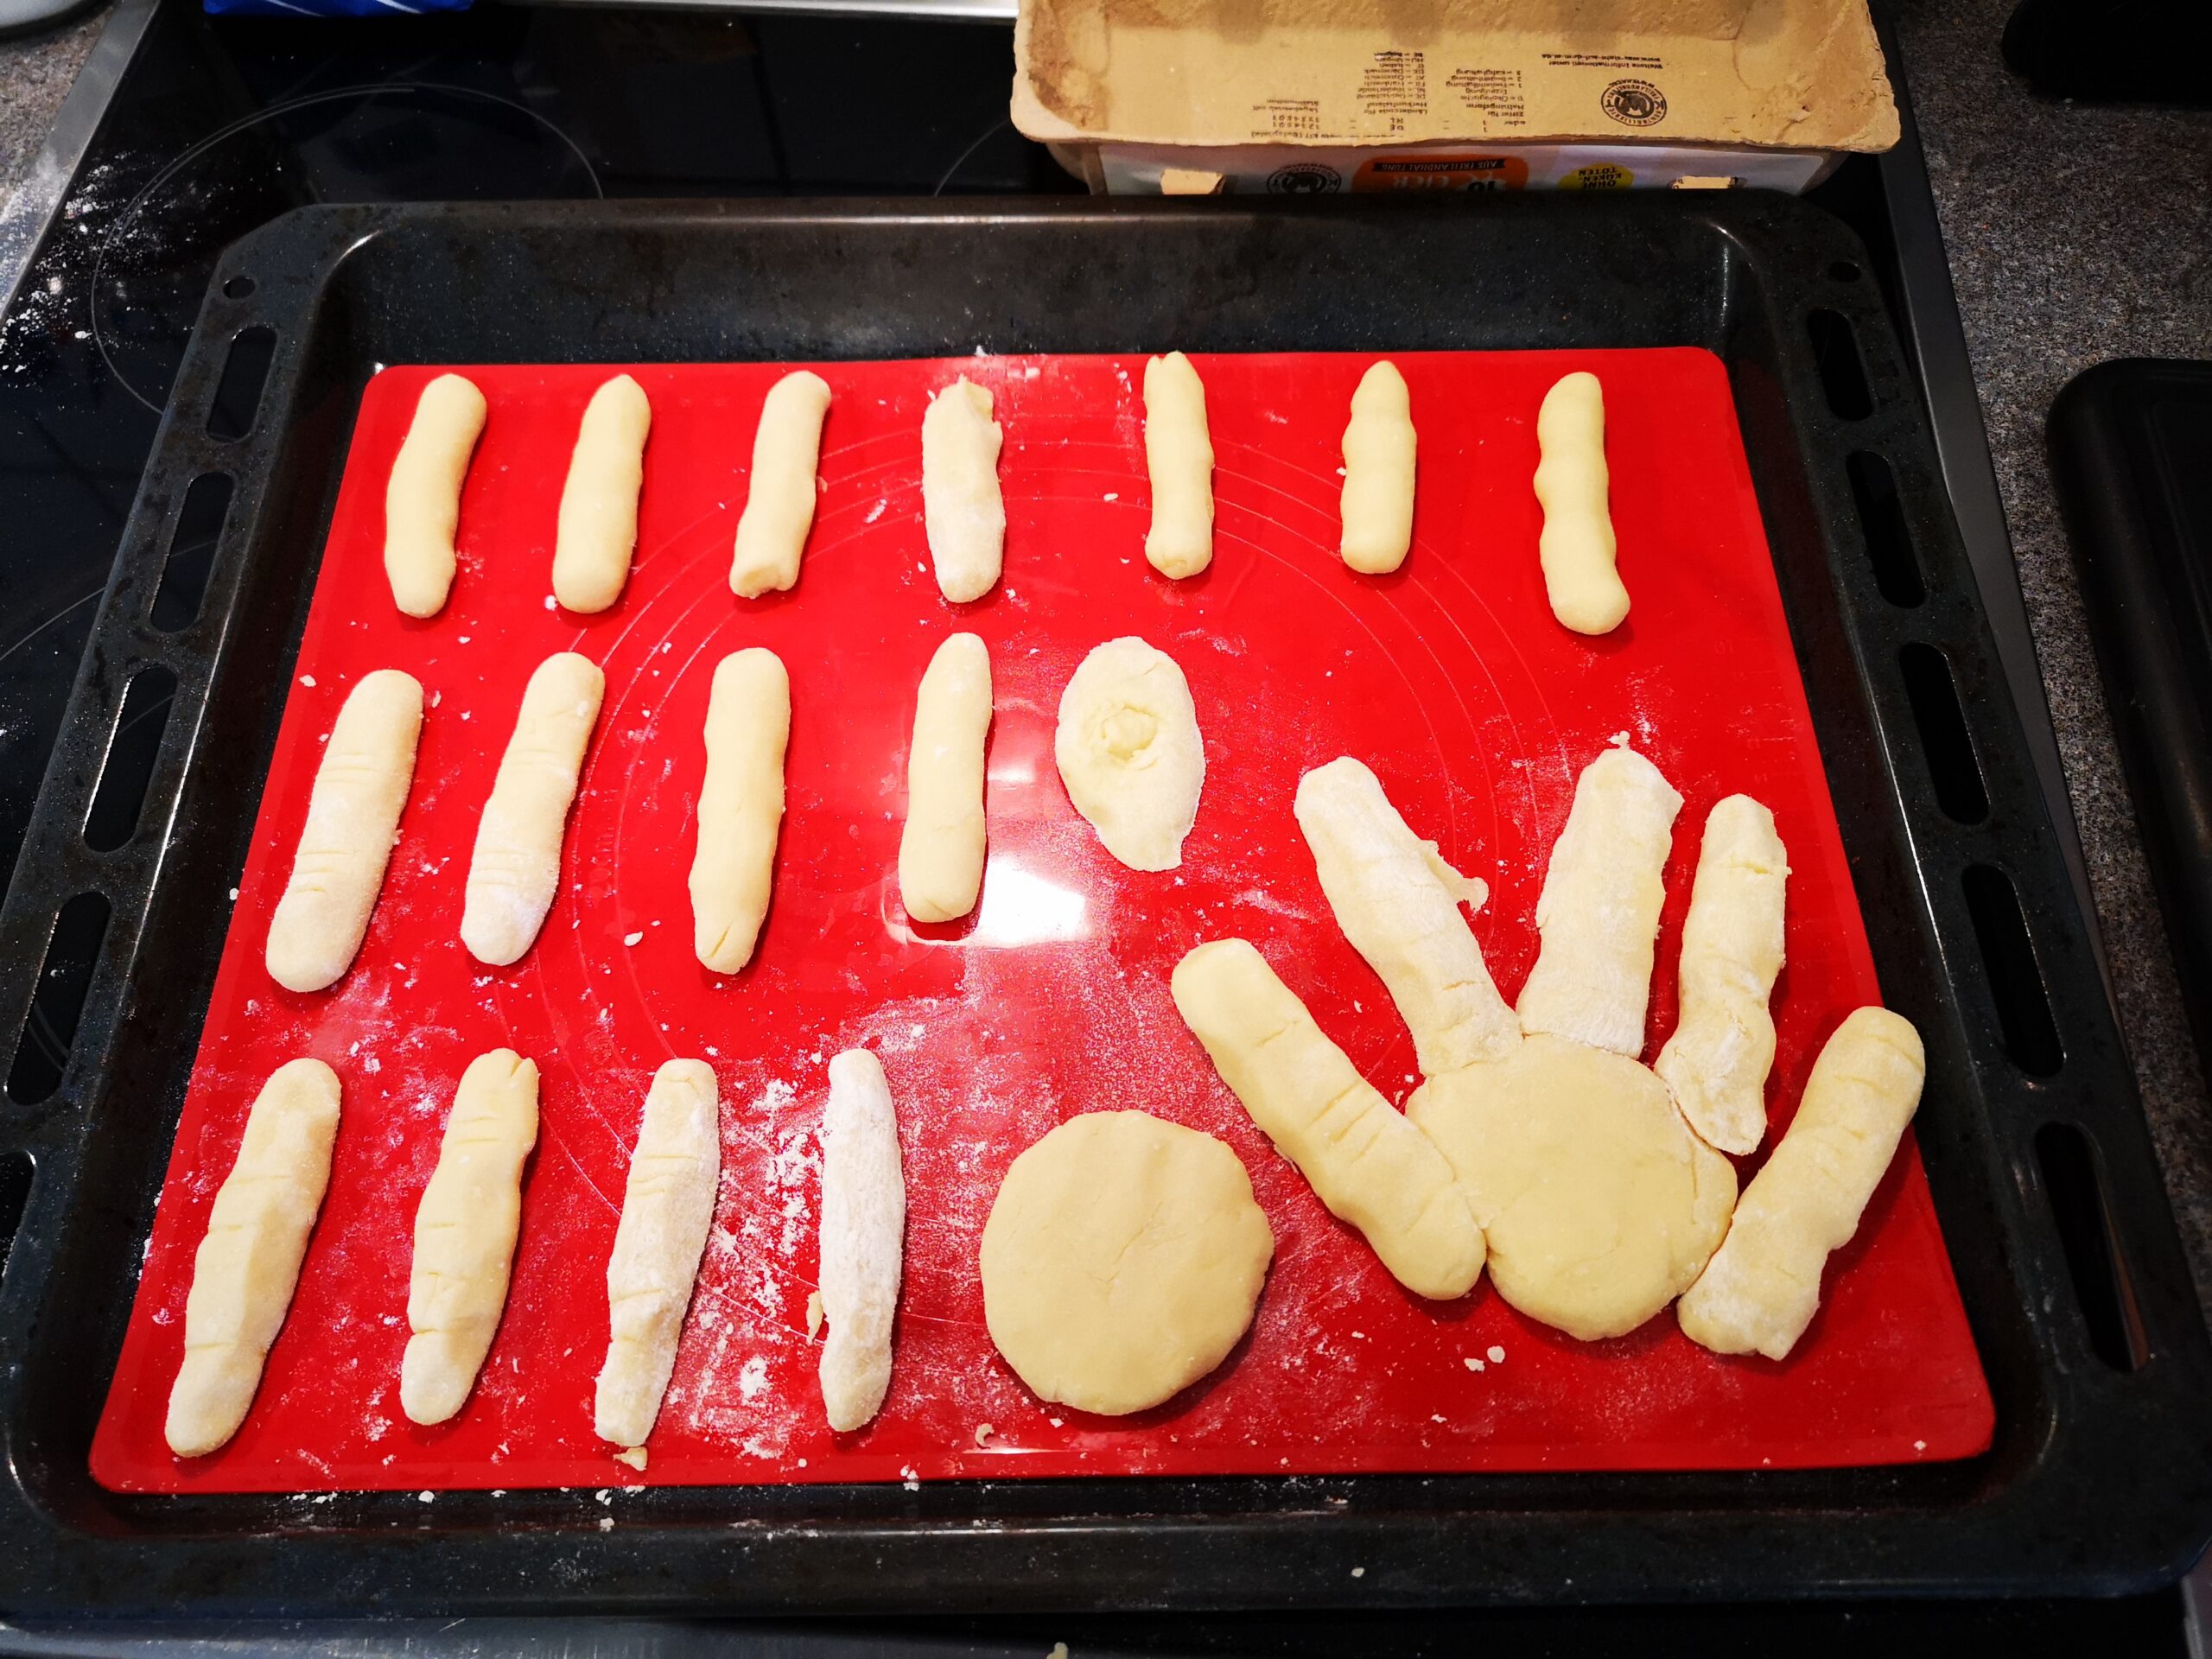
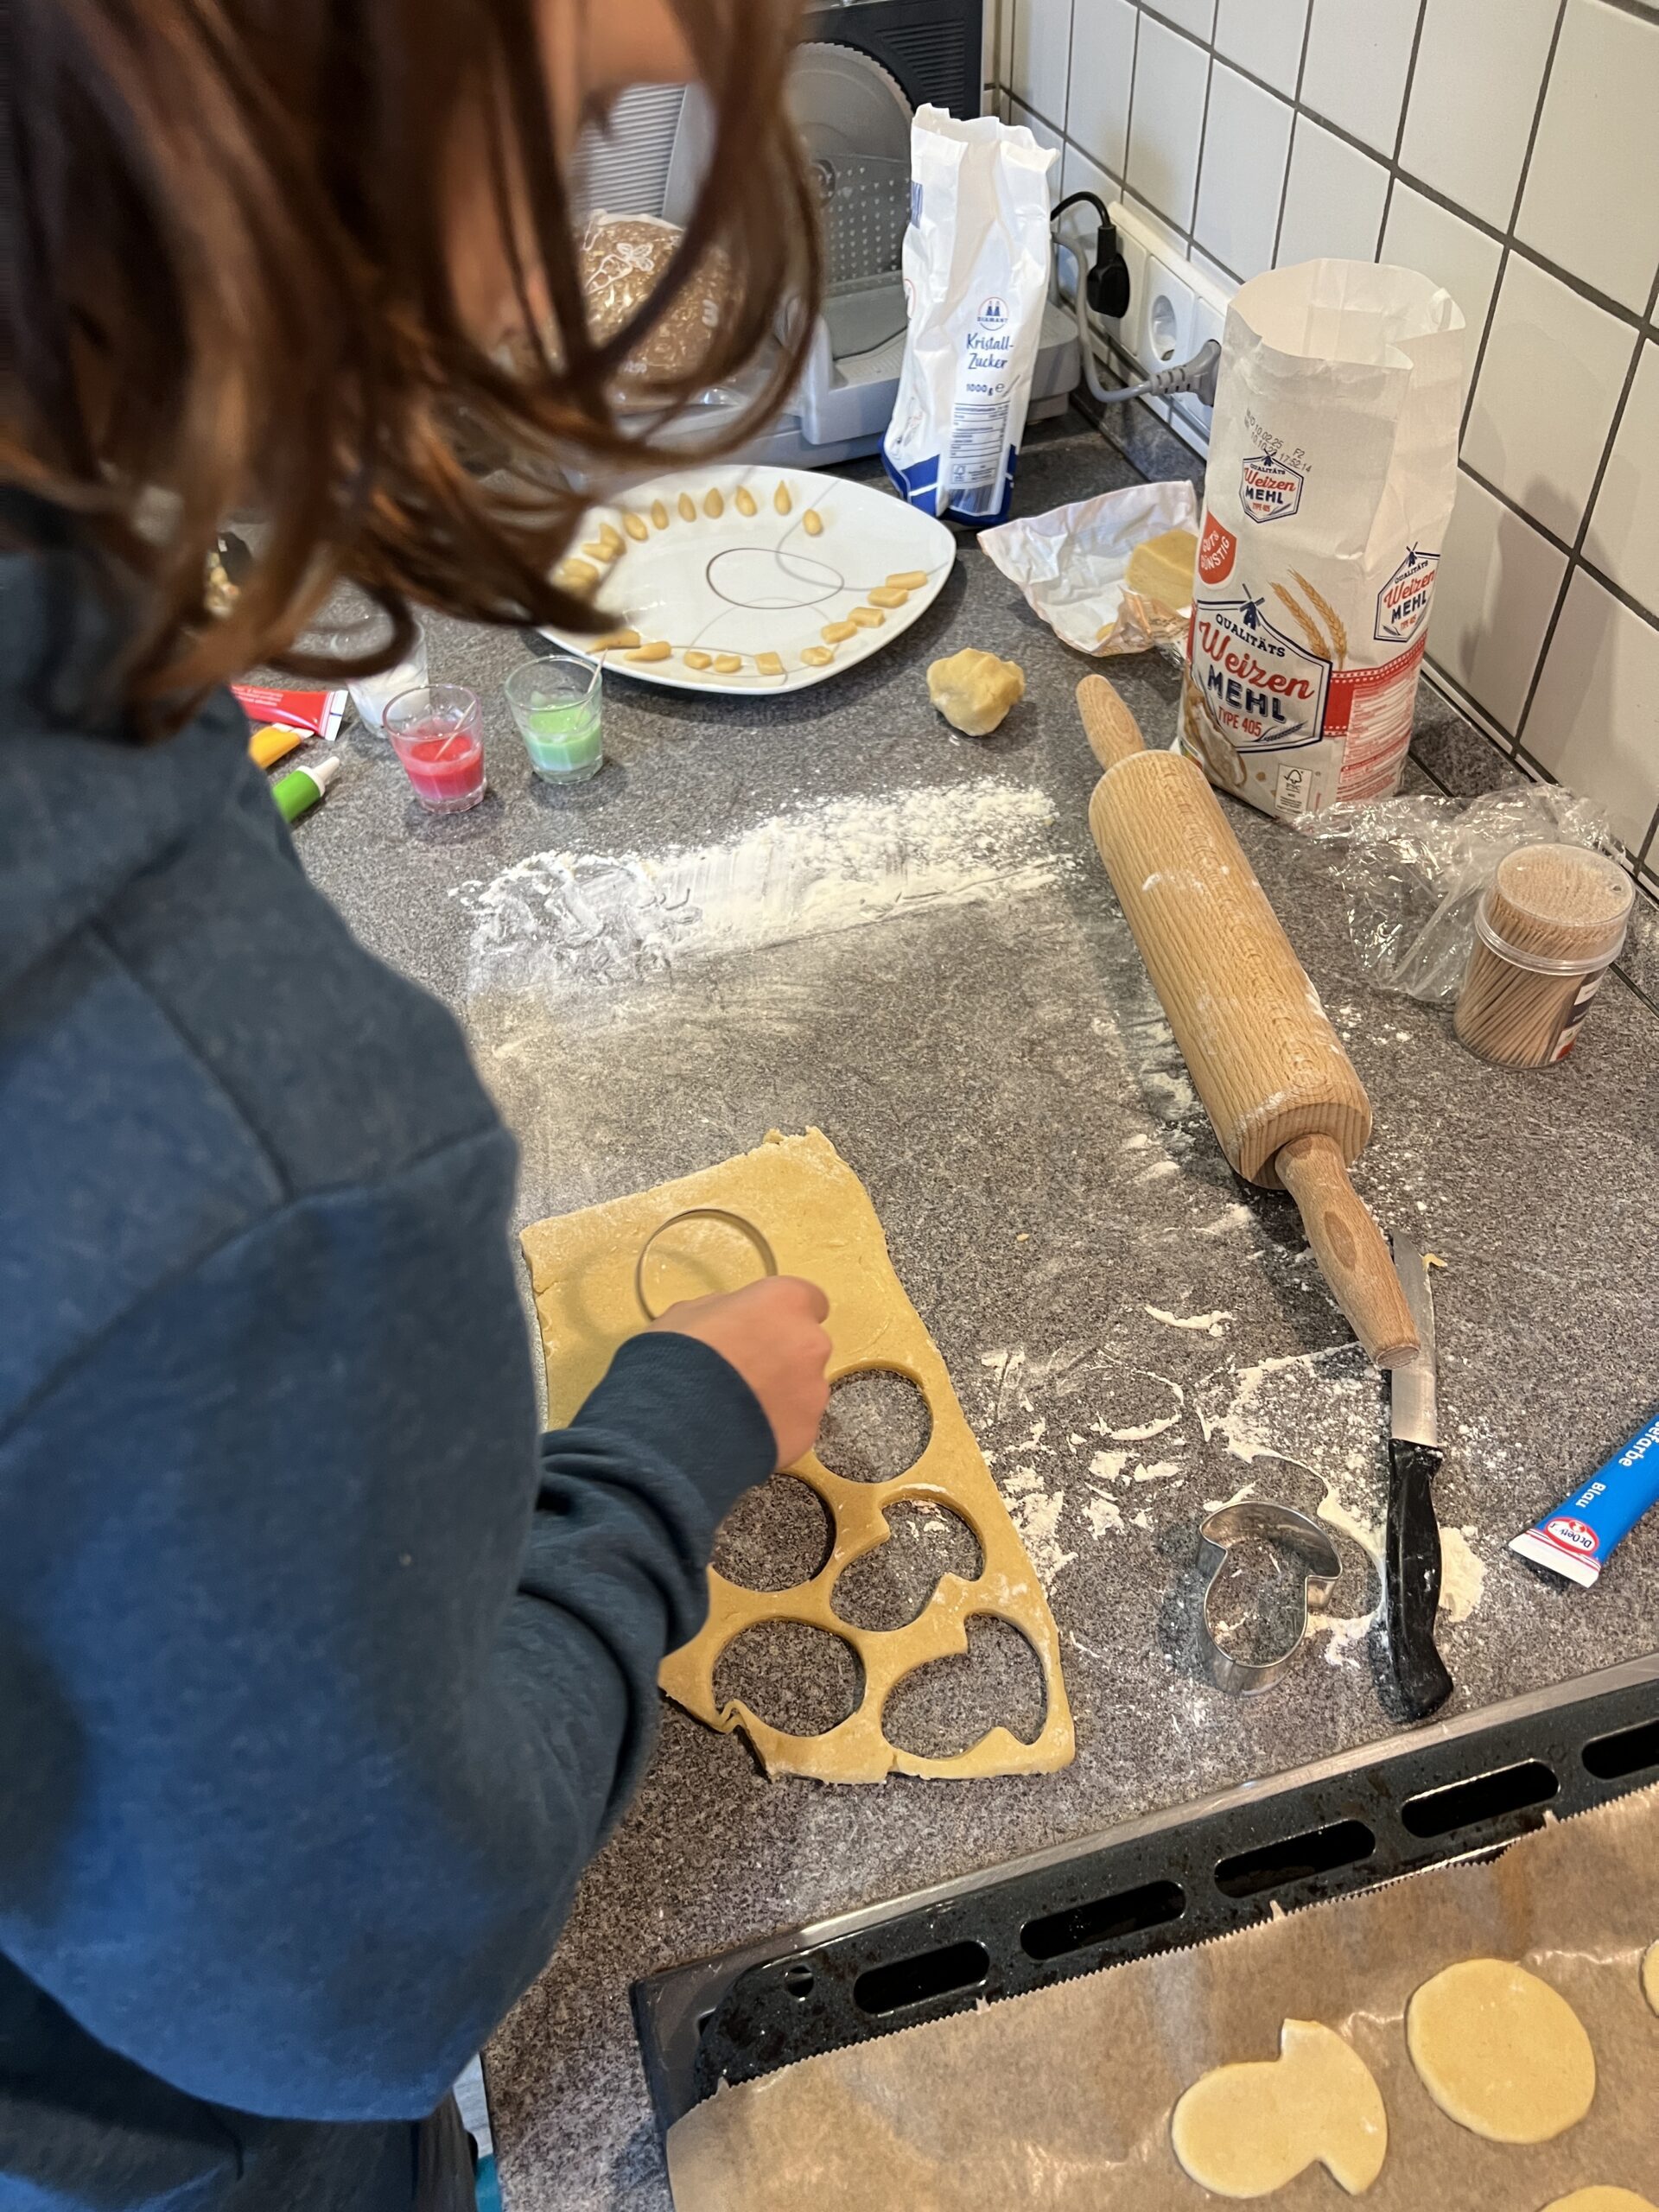
  • Bring one half of the dough into the shape of thin fingers. This is important because during the baking process their size will increase a lot
  • For the same reason, make sure to leave enough space between the individual fingers. They do not have to be perfectly straight, quite the opposite actually. It looks even more convincing if the fingers are a bit deformed and irregular
  • Once the oven is preheated, in a first step, bake the fingers for about 7 minutes
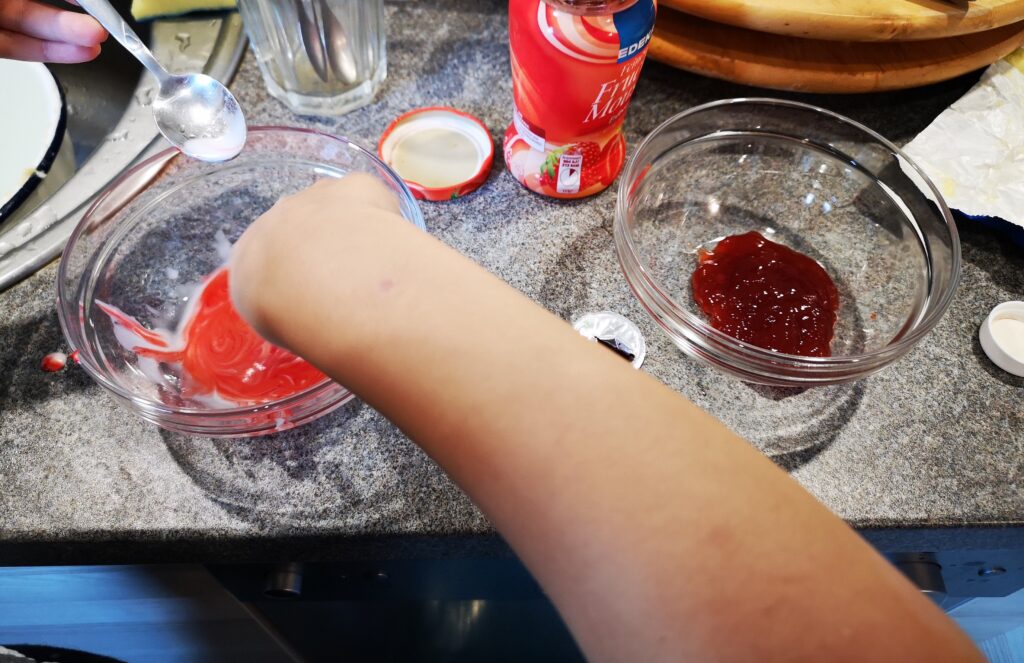
  • Remove them from the oven, decorate them with either coloured icing or marmelade plus almonds/cashews and bake them for another 6-8 minutes, depending on your oven. If you want to use marzipan instead, it is best to add it after the cookies are completely baked. Otherwise the marzipan may become too dark.
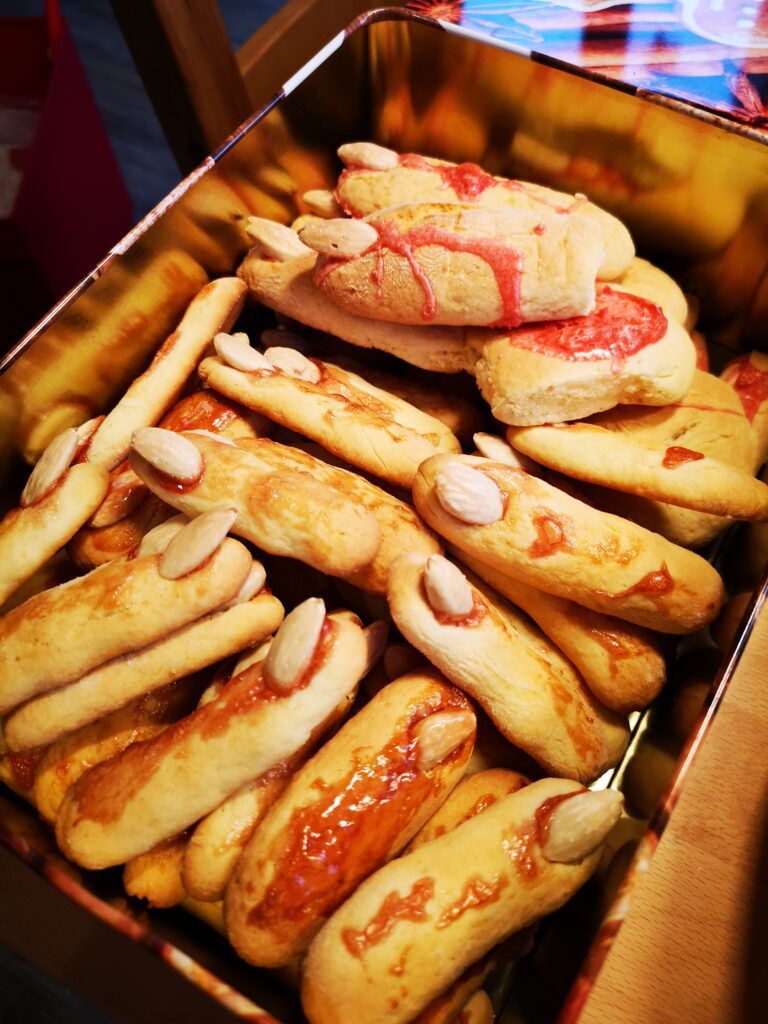
  • Remove the spooky fingers when they have a nice and golden colour, add more marmelade if you like and enjoy them warm or cold!
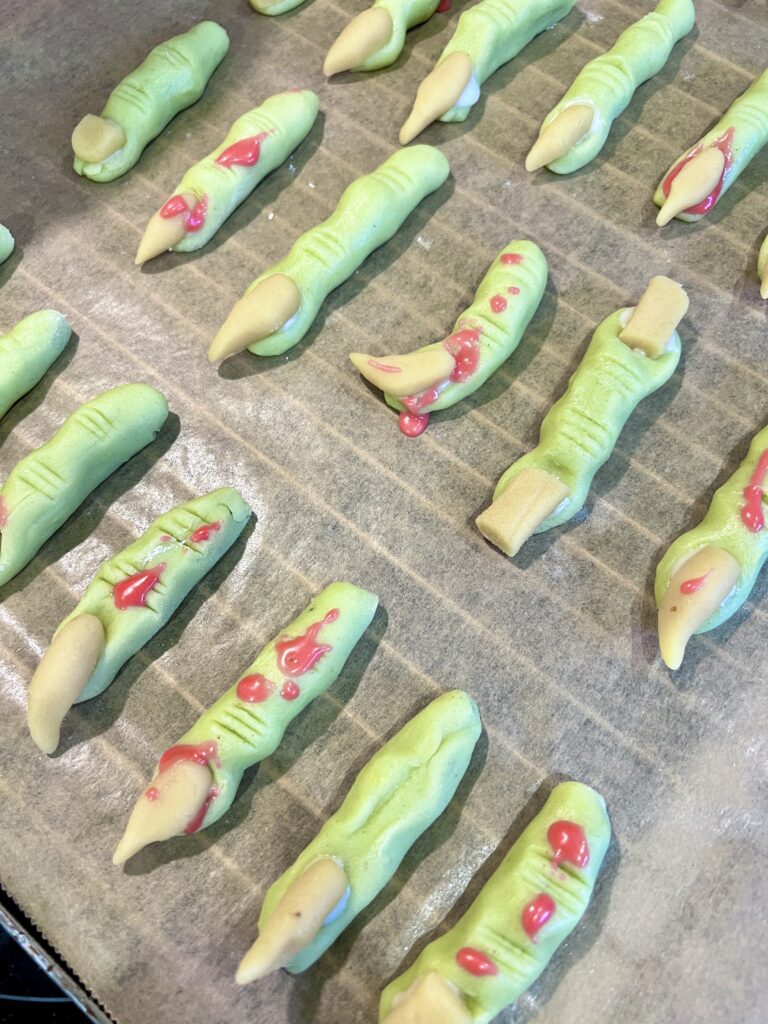
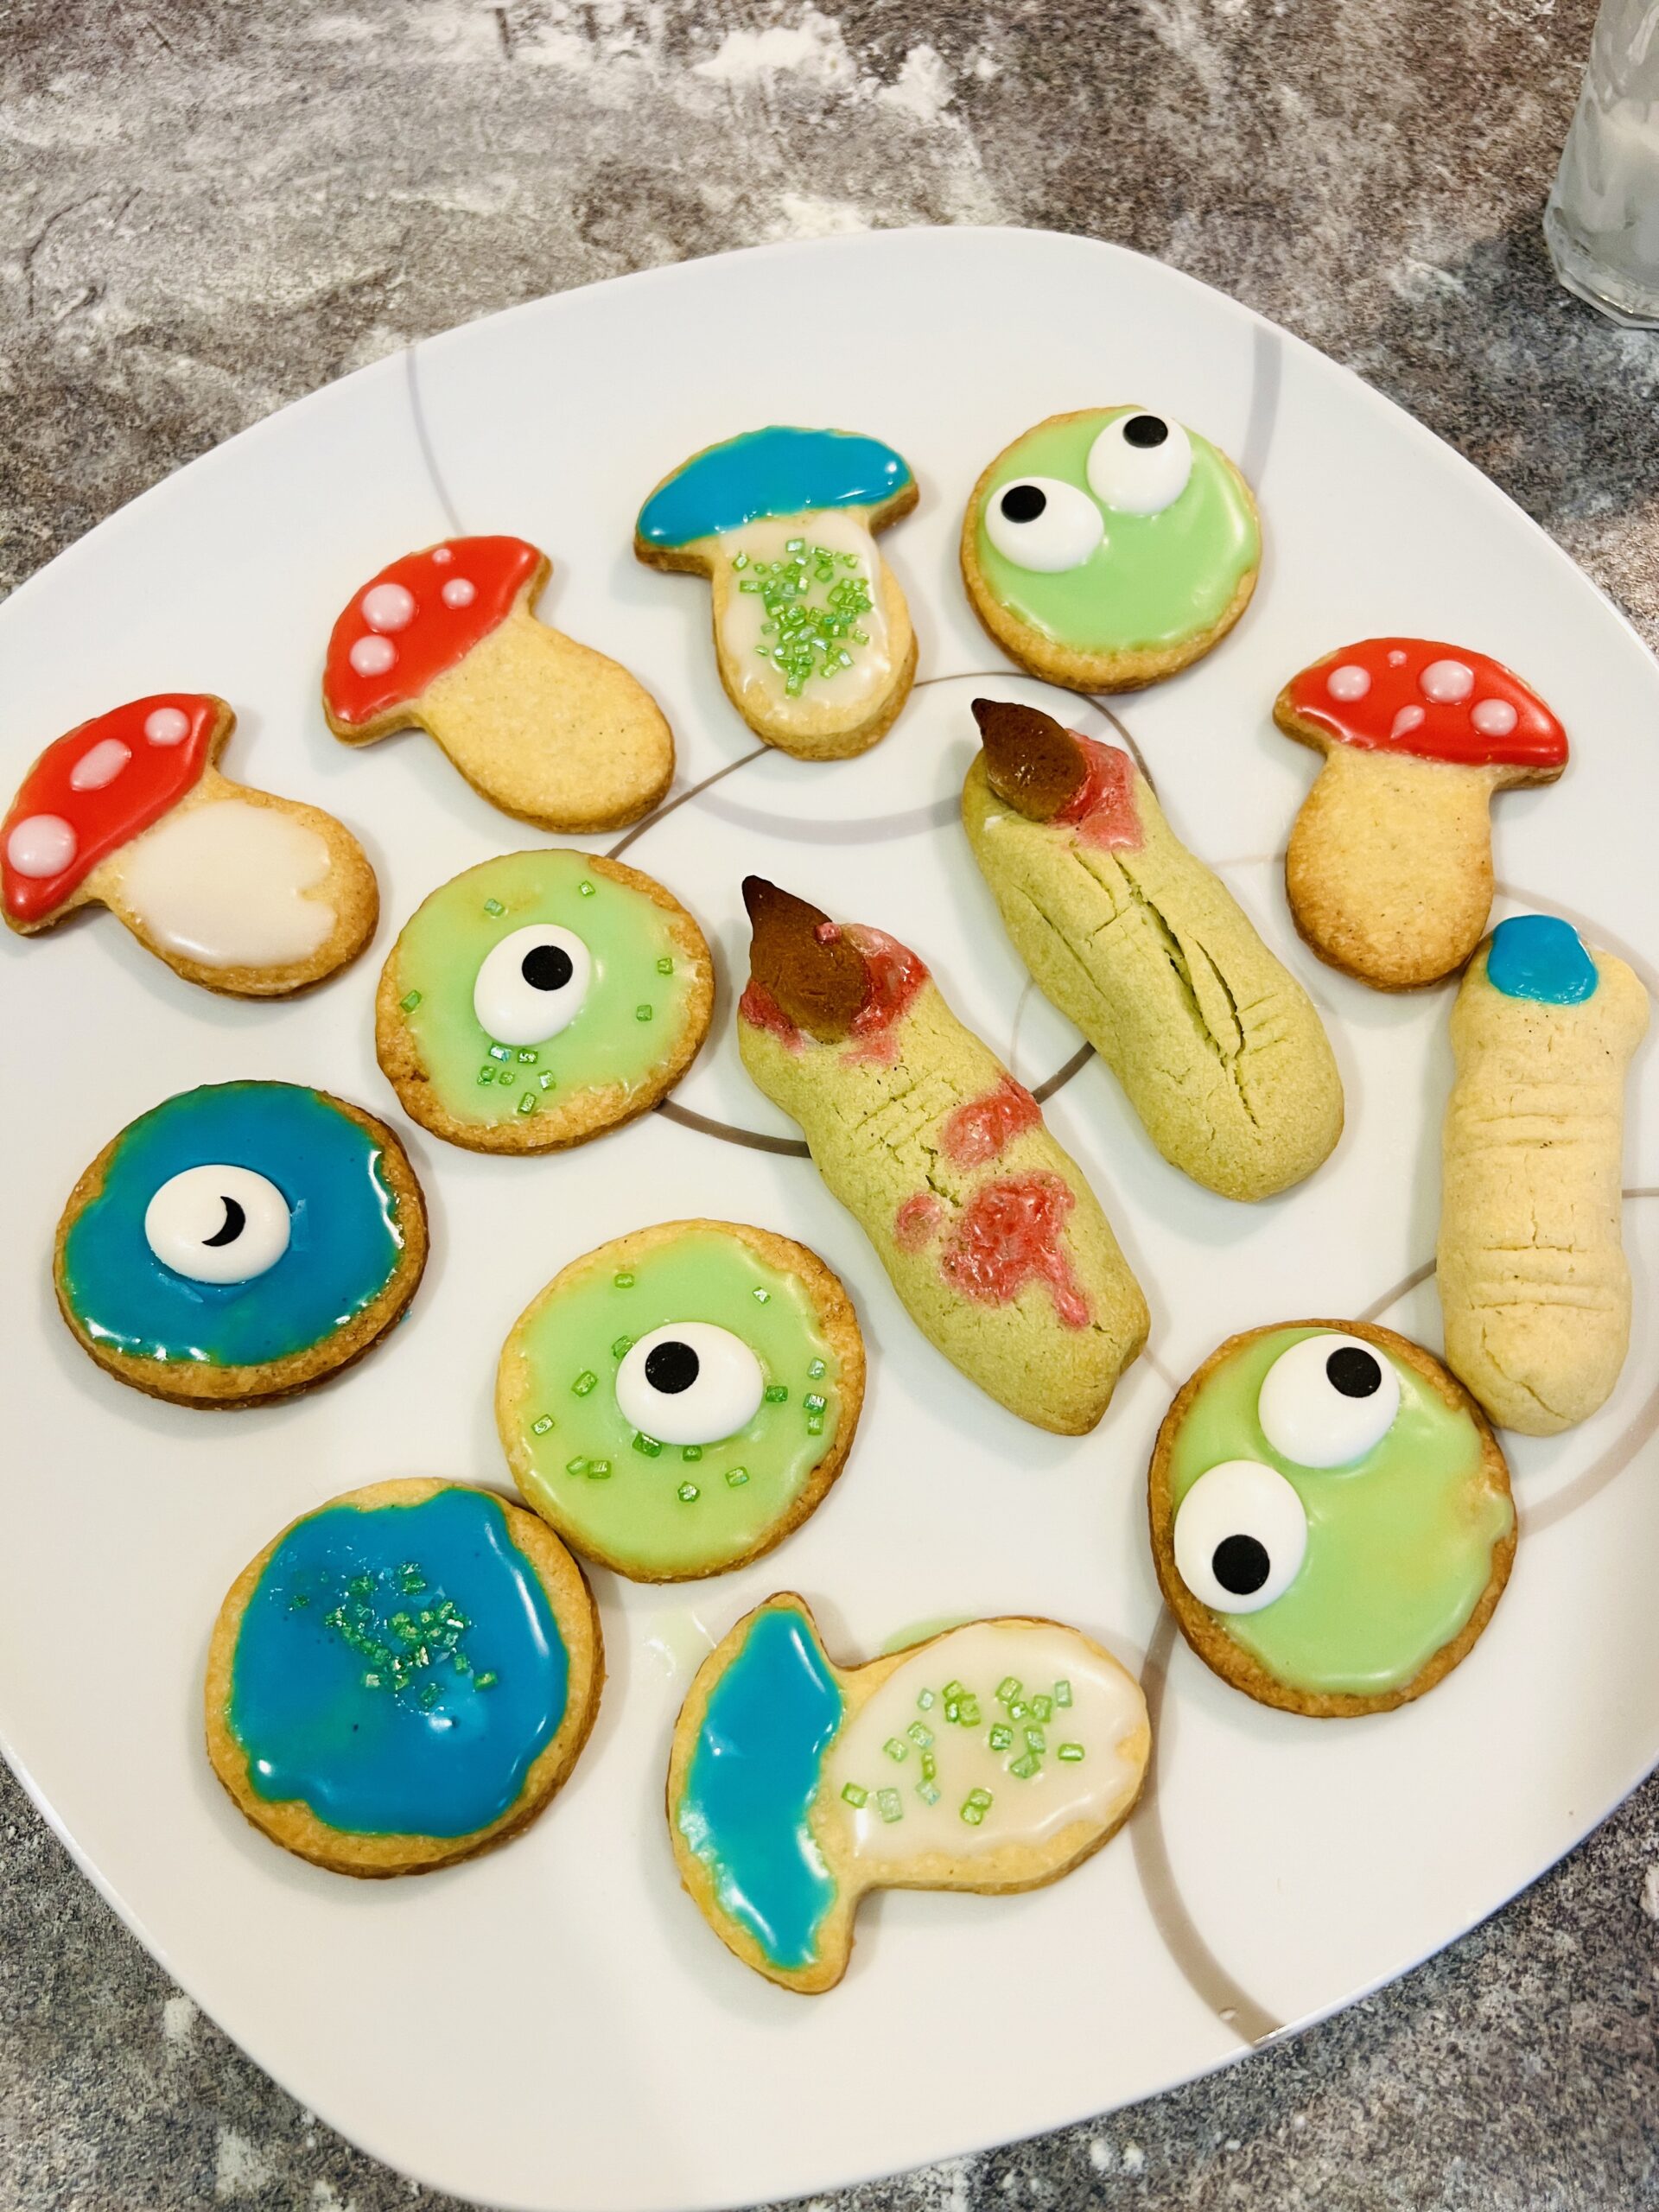
As you can see, we experimented a little with food colouring for our second attempt and dyed our spooky fingers green. We also started with almonds the first time, but later switched to marzipan because A) it is so easy to mould into different shapes for the fingernails and B) the kiddo simply prefers marzipan to almonds. I mean… who doesn’t? 😋
Halloween Cookies
Halloween Cookies
Halloween Cookies
Halloween Snack, spooky finger, baking, marzipan, creative

Part 2: Halloween Cookies

Halloween Cookies
Halloween Cookies
  • On a lightly floured surface, roll out the other half of the dough and use a cookie cutter or a knife (for the coffins) to get the dough in the desired shape
  • Place the cookies on a baking tray covered with a baking sheet or mat
  • Bake the cookies for 5-8 minutes depending on your oven, or until they are lightly golden
  • Remove them from the baking tray and set the cookies aside to cool
  • For the icing, mix some water with a food colouring of your choice as well as the powdered sugar and decorate the cookies the way you like
  • Let the cookies dry for a while and then enjoy!

Tips

  • Make sure the texture of the icing is not too liquid and add more sugar if necessary
  • Experiment with different colours, shapes and other edible decoration if you like. This is the perfect family activity and especially kids become always so creative at this point and think of the most fantastic ways to create very unique-looking cookies
  • Pro Tip: the remaining halloween cookies naturally are the ideal snack for kindergarden, school and work and they certainly guarantee you and your kids a few amazed looks 😉

By the way: those rectangular-shaped cookies are supposed to look like used plasters. Next year we will try to make them look just that little bit more disgusting 🤣

Halloween Cookies

Need some help with your search?